
Best TV Equalizer Settings For Clear Voice
Are you tired of straining your ears to catch every word during your favorite TV shows or movies? Are you constantly adjusting the volume because the dialogue gets drowned out by background noise or music? Many TV viewers struggle with this common issue, but the solution might be simpler than you think: optimizing your TV equalizer settings for clear voice. Let’s walk through the steps to achieve the Best TV Equalizer Settings For Clear Voice that every word spoken on screen is crystal clear. From basics of equalization to practical tips and real-life anecdotes to make your TV watching experience more enjoyable. So, grab your remote control, and let’s get started on the path to audio nirvana.
Understanding the Basics of Equalization
Before we dive into the specifics of TV equalizer settings, it’s essential to understand the basics of equalization and how it can impact your audio experience. Equalization, commonly referred to as EQ, is the process of adjusting the balance between different audio frequencies. In simple terms, it allows you to control how loud or soft different parts of the audio spectrum are, from the low rumble of a bass drum to the crispness of a cymbal crash.
TV equalizer settings are a set of controls that let you fine-tune the audio output of your television to match your preferences and the type of content you’re watching. These settings typically include sliders or numerical adjustments for various frequency ranges, such as bass, midrange, and treble. By making precise adjustments to these settings, you can enhance the clarity of voices and make dialogue more prominent while minimizing background noise.
Why Clear Voice Is Crucial
Clear voice is essential for an immersive TV viewing experience. Whether you’re watching a suspenseful thriller, a heartfelt drama, or an action-packed blockbuster, the dialogue between characters is the backbone of storytelling. If you can’t hear what the characters are saying or if their voices are muddled by other sounds, you’re missing out on a significant part of the narrative.
Moreover, struggling to hear dialogue can be frustrating and fatiguing, leading to a less enjoyable TV-watching experience. This is where optimizing your TV equalizer settings comes into play. With the right adjustments, you can make sure that voices are front and center, making it easier to follow the storyline and feel more connected to the characters.
Step-by-Step Guide: Setting Up Your TV Equalizer for Clear Voice
Now that you understand the importance of clear voice and the fundamentals of equalization, let’s delve into the step-by-step process of optimizing your TV equalizer settings. Remember, every TV model is different, so the exact steps may vary. Consult your TV’s user manual for specific instructions, and don’t be afraid to experiment to find the settings that work best for you.
1. Accessing the Equalizer
The first step is to access your TV’s equalizer settings. This can usually be done through your TV’s menu system.
Here’s a general guide on how to find it:
- Press the “Menu” button on your remote control.
- Navigate to the “Audio” or “Sound” settings.
- Look for an option related to “Equalizer” or “Audio Settings.”
Once you’ve located the equalizer settings, you’re ready to start making adjustments.
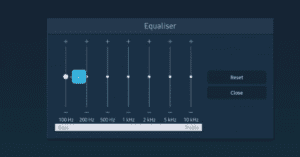
2. Balance the Frequencies
Now, it’s time to adjust the frequency sliders to optimize your TV equalizer settings for clear voice. Here’s a recommended starting point:
- Bass (Low Frequencies): Set this to a moderate level. Too much bass can overpower voices.
- Midrange (Speech Frequencies): Boost this range slightly to make voices more prominent.
- Treble (High Frequencies): Keep this at a moderate level. Increasing it too much can make voices sound shrill.
3. Use Preset EQ Modes
Many modern TVs come with preset equalizer modes designed for specific content, such as movies, sports, or music. These presets can be a helpful starting point. Experiment with these presets and see if any of them enhance voice clarity. If you find one that works well for your TV shows and movies, stick with it.
4. Fine-Tune the Settings
Don’t hesitate to make small adjustments and fine-tune the settings further.
Here are some tips for doing so:
- If voices still seem muffled, increase the midrange frequencies slightly.
- If you’re watching a dialogue-heavy movie, consider using a “Clear Voice” or “Dialog Enhancer” feature if your TV offers it.
- Pay attention to the background noise reduction settings and adjust them as needed to minimize distractions.
5. Test and Repeat
After making adjustments, it’s essential to test the settings with different types of content. Watch a movie, a TV show, and perhaps a live sports event to see how the changes affect the audio. Make note of what works best for each type of content, and don’t hesitate to go back and readjust as needed.
Real-Life Anecdotes: The Impact of TV Equalizer Settings
To emphasize the significance of optimizing your TV equalizer settings, let’s explore a few real-life anecdotes from individuals who experienced a remarkable transformation in their TV-watching experiences.
Anecdote 1: The Whispering Detective
John, an avid fan of crime dramas, used to struggle with understanding the soft-spoken detective in his favorite series. Frustrated by constantly rewinding and straining to hear crucial clues, he decided to tweak his TV’s equalizer settings. By boosting the midrange frequencies and activating the “Clear Voice” feature, John transformed his viewing experience. He could finally hear every whispered confession and crack the case alongside the detective.
Anecdote 2: Movie Nights Made Magical
Samantha loved hosting movie nights with her friends, but she noticed that the dialogues in action-packed films often got lost amidst the explosions and intense soundtrack. After adjusting her TV’s equalizer settings and fine-tuning them to prioritize voice clarity, Samantha’s movie nights became a hit. Her friends appreciated the newfound ease of following the movie’s plot, and she received compliments for her impeccable audio setup.
Why Investing in Quality Audio Equipment Matters
While optimizing your TV’s built-in equalizer settings can make a significant difference, investing in quality audio equipment can take your audio experience to the next level. Here’s why it’s worth considering:
- Sound bars: A sound bar can provide enhanced audio quality and clarity, especially for those with built-in dialogue enhancement features.
- Home Theater Systems: If you have the space and budget, a home theater system with a dedicated center channel speaker can reproduce dialogue with remarkable precision.
- Headphones: For late-night viewing or when you don’t want to disturb others, a good pair of headphones can deliver impeccable voice clarity.
Remember, your choice of audio equipment should complement your TV equalizer settings to create the ultimate audio experience.
Confident Purchase: Recommended Products
Now that you’re armed with knowledge about optimizing your TV equalizer settings and the importance of quality audio equipment, here are some recommended products that can elevate your TV-watching experience:
- Example Sound bar Model XYZ: This sound bar offers crystal clear dialogue enhancement and a range of EQ presets to suit different content types.
- Example Home Theater System ABC: With a dedicated center channel speaker and immersive surround sound, this home theater system ensures every word is heard.
- Example Noise-Canceling Headphones 123: These headphones provide exceptional voice clarity, making them perfect for late-night movie marathons.
Conclusion
Your Path to Audio Nirvana
Achieving TV equalizer settings that deliver crystal clear voice doesn’t have to be a daunting task. With a basic understanding of equalization principles and a willingness to experiment, you can significantly improve your TV-watching experience. Remember to use the anecdotes from real-life viewers as inspiration, and don’t hesitate to invest in quality audio equipment for that extra edge.
By following this step-by-step guide and considering the recommended products, you’ll be well on your way to audio nirvana. No more missed dialogue, no more frustration—just pure enjoyment of your favorite TV shows and movies. So, grab your remote control, fine-tune those settings, and get ready for a whole new level of audio clarity.
Frequently asked Questions
- How can I make my TV voice clearer?
Improving the clarity of voices on your TV involves adjusting your TV’s equalizer settings to prioritize speech frequencies. Here are steps to achieve this:
1. Access Your TV’s Equalizer Settings:
- Press the “Menu” button on your TV remote.
- Navigate to the “Audio” or “Sound” settings.
- Look for options related to “Equalizer” or “Audio Settings.”
2. Balance the Frequencies:
- Boost the midrange frequencies (speech frequencies) to make voices more prominent.
- Keep the bass at a moderate level to prevent it from overpowering voices.
- Maintain the treble (high frequencies) at a moderate level to avoid making voices sound shrill.
3. Use Preset EQ Modes:
- Many TVs offer preset equalizer modes designed for specific content, such as movies or dialogues. Try these presets and see which one works best for voice clarity.
4. Fine-Tune the Settings:
- Make small adjustments based on your preferences and the content you’re watching.
- Experiment with features like “Clear Voice” or “Dialog Enhancer” if your TV offers them.
- Adjust background noise reduction settings to minimize distractions.
5. Test and Repeat:
- Test the settings with various types of content, such as movies, TV shows, and live sports.
- Make note of what works best for each type of content and readjust as needed.
By following these steps and tweaking your TV’s equalizer settings, you can significantly improve the clarity of voices and enjoy a more enjoyable TV-watching experience.
- What is the best equalizer setting for clear dialogue?
- Boost the Midrange Frequencies (Speech Frequencies): Increase the sliders or settings associated with midrange frequencies. These frequencies typically cover the range where most human voices fall (approximately 500Hz to 2kHz). By boosting this range, you make dialogue more prominent.
- Moderate Bass Levels: Keep the bass frequencies (low frequencies) at a moderate level. Excessive bass can overpower voices and make them less clear.
- Moderate Treble Levels: Maintain the treble frequencies (high frequencies) at a moderate level. Too much treble can make voices sound shrill and unnatural.
- Use Dialogue Enhancer or Clear Voice Features: Some TVs and audio systems offer specific features like “Dialogue Enhancer” or “Clear Voice.” These features are designed to prioritize and enhance dialogue clarity. Activate them if available.
- Experiment and Fine-Tune: After making initial adjustments, watch different types of content (e.g., movies, TV shows, and sports) to ensure that the dialogue remains clear without being drowned out by other sounds. Fine-tune the settings as needed based on your specific preferences.
- What is the best equalizer setting for voice clarity?
- Boost Midrange Frequencies (Speech Frequencies): Increase the sliders or settings associated with midrange frequencies, typically ranging from 500Hz to 2kHz. This is the range where most human voices fall, so boosting it can make dialogue and vocals more prominent and clear.
- Moderate Bass Levels: Keep the bass frequencies (low frequencies) at a moderate level. Excessive bass can overwhelm voices and make them less clear.
- Moderate Treble Levels: Maintain the treble frequencies (high frequencies) at a moderate level. Too much treble can make voices sound sharp or shrill, which can be distracting.
- Use Preset Modes: Some audio equipment and devices offer preset equalizer modes designed for specific content, such as “Dialogue” or “Voice.” These presets are often optimized for voice clarity, so give them a try and see if they enhance your listening experience.
- Experiment and Fine-Tune: After applying these general settings, listen to various types of content, such as movies, TV shows, music, or podcasts. Adjust the equalizer settings as needed based on the specific content and your personal preferences. Trust your ears and make subtle adjustments until you achieve the desired voice clarity.
- Consider Room Acoustics: Keep in mind that the acoustics of your room can also affect voice clarity. If you have a highly reflective room with lots of hard surfaces, you may need to make additional adjustments to compensate for reverberations and echoes.
It’s important to note that the ideal equalizer settings can vary from one audio system to another, so there’s no one-size-fits-all solution. Experimentation and fine-tuning are key to finding the best settings for your specific setup and preferences.
- How do I adjust my equalizer for better voice?
- Access Your Equalizer Settings:
- Use your remote control or device settings to access the equalizer settings. These settings are typically found in the “Audio” or “Sound” menu.
- Balance the Frequencies:
- Boost the midrange frequencies (speech frequencies), typically ranging from 500Hz to 2kHz. This will make voices and dialogue more prominent.
- Keep the bass frequencies (low frequencies) at a moderate level. Excessive bass can drown out voices.
- Maintain the treble frequencies (high frequencies) at a moderate level. Too much treble can make voices sound sharp or harsh.
- Use Voice or Dialogue Enhancer Features (If Available):
- Some audio equipment or devices have specific features like “Voice Enhancer” or “Dialogue Mode.” Activate these features as they are designed to prioritize voice clarity.
- Try Preset EQ Modes (If Available):
- Many audio systems offer preset equalizer modes optimized for different content types, including dialogue. Experiment with these presets to see if they enhance voice clarity.
- Fine-Tune Based on Content:
- Play various types of content, such as movies, TV shows, music, or podcasts, to ensure that the voice clarity remains consistent across different media.
- Adjust the equalizer settings as needed for each type of content. For example, you may need different settings for movies with heavy dialogue compared to music with vocals.
- Listen and Make Subtle Adjustments:
- Trust your ears and make small, subtle adjustments to the equalizer settings as you listen. Even slight changes can have a noticeable impact on voice clarity.
- Pay attention to background noise and adjust noise reduction settings if necessary to minimize distractions.
- Consider Room Acoustics:
- Keep in mind that the acoustics of your room can affect voice clarity. If your room has excessive echoes or reverberations, you may need to make additional adjustments or consider acoustic treatments.
- Take Notes:
- Keep a record of the settings that work best for different types of content and environments. This can help you quickly adjust your equalizer settings in the future